| lots of cool stuff | |||||
| JUST FOR THE FUN OF IT | |||||
| About Us | Contact Us | ||||
|


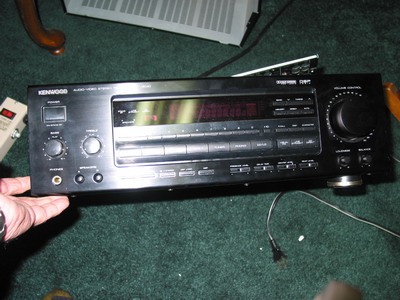
How To Make a Simple Repair To An Electronic ReceiverObject: This is a short article on how to make simple repairs to an AM/FM receiver (surround sound, etc.).In this particular case, this is a Kenwood Audio-Video Stereo Receiver KR-V8040. It is a unit I purchased on Ebay and it probably was not in good shape when I bought it, but I was new to Ebay and kept it without complaint.
The first problem that developed was that it would suddenly cut off without warning. Next, the large volume knob got really loose and felt like it was coming apart inside the cabinet. Finally it quit working altogether. I shelved it for several years, but recently have decided to try to repair it and put back into use.
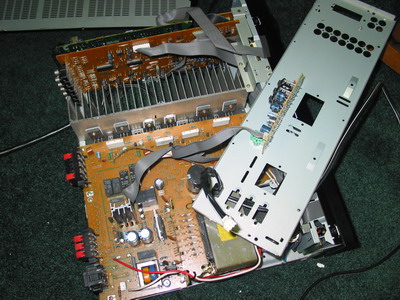
The steps I took are listed here: The first thing is to identify all the cabinet screws that will allow removal of the outer case. I put these in an old ashtray, each size in a different place. Finally, the case came off, allowing me to repair the knob. That was a simple problem. The knob is attached to its own small circuit board and is held to the case by a simple retaining nut, which had worked loose. I simply tightened this with a small wrench, making sure the circuit board stayed in the vertical position.
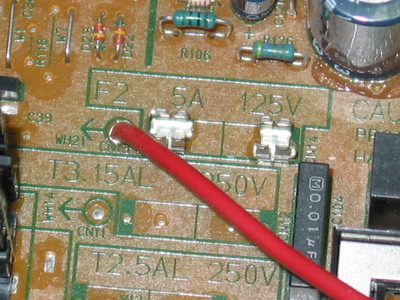
Next I tackled the on/off problem (now permanently off). First, I discovered three fuse holders built into the main circuit board. Two of the three fuses were burned out, requiring replacement. I found exact replacements at Radio Shack. Once I replaced these, the unit would come on if I lifted slightly up on the circuit board. This was an indication that the circuit board had either a crack in it or a loose solder joint. I was able to remove more screws and get the circuit board to move significantly up and away from the bottom mount to the cabinet-about 2 inches. While in this position, the unit worked find, but when placed back into position to be bolted down, it refused to work.
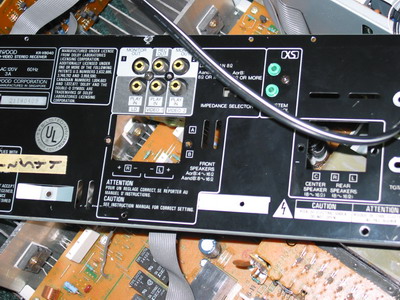
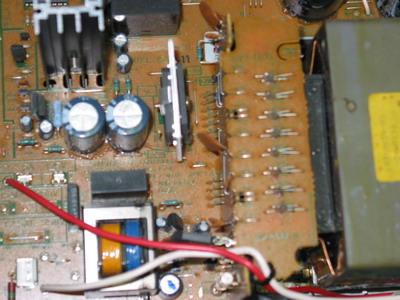
I have a magnifying lighted glass which I have examined the board with and so far have not discovered a crack in the board or a loose solder joint. Needless to say, I have not solved the problem yet, but I believe I have the solution. My next step will be to use a small soldering iron with a small pointed tip to touch each of the solder connections on the bottom of the board. I have isolated it to about 2 square inches of the board on the corner next to where the 110-volt wiring comes in. I have determined that the voltage is good in that part of the board, but that there is a break before it leaves that immediate area to return to the transformer up near the front of the unit.
By re-melting the solder connections on the circuit board in this area, I think I will find the loose one and solve the problem. If not, then the unit is trash, because the repair bill would be more than I would want to pay for a unit of this age. Besides, I can probably buy another one of Ebay! Ha!
|