| lots of cool stuff | |||||
| JUST FOR THE FUN OF IT | |||||
| About Us | Contact Us | ||||
|


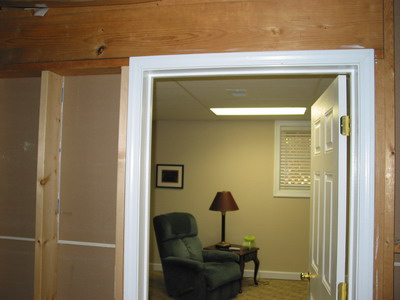
How to Hang a Pre-Hung DoorObject: A short “how to” article on hanging your own pre-hung doors so that you don’t have to hire a contractor or a carpenter to do it for you, thus saving yourself a lot of money.First of all, this article assumes that you have an uncased opening that you wish to have a door in. The typical need for this would occur in a remodeling job or finishing a basement or a room added to your present house. By the point you need a pre-hung door, the walls have been sheetrocked or have had paneling installed, creating what people in the trade call a “rough opening”. You need to measure the rough opening and ask for a door at the building supply center that will fit the rough opening that you have. Doors come right handed and left handed. You will need to know on which side you want the door hinged and which way the door will swing. The salesperson at the building center will help you determine which way the door will swing, once hung. You just need to be able to tell him which way you want the door to swing when you face the door from either the inside or the outside.
The door will probably be packaged with cardboard around the top and/or bottom and will be strapped with nylon straps. Be sure you transport the door to the location where you will install it without taking the wrapping off. The door jam will most likely have the casing molding already installed, too. The whole assembly will be together as it will be when installed in the opening. Once you are ready to install (have your nails and hammer within reach), cut the bands and remove the cardboard and straps. Gently separate the two halves of the casing. One side slides into the other side, creating the look of one piece of casing. Be very careful when separating the two parts, since one piece by itself will be flimsy. You will have two uprights and a top piece, all assembled together. If you manage to either spread the two uprights apart or squeeze them together, you will break apart the seam where the moldings are nailed together. This will be a problem if this happens. The door is hinged to one side of the assembly and will be closed with a plastic plunger and will have spacers holding the door precisely in place with the exact amount of crack needed for the door to operate properly. Insert this side of the casing into the rough opening first and position it so that the whole assembly is centered in the opening, or if possible, closer to the hinge side. You should now place a spirit level (preferably one at least 4’ long) on the upright to determine if it is plumb (vertically level). Once you have it positioned where you want it, drive a 10-penny finishing nail part way into the molding near the top corner on the hinge side to stabilize it. Re-check the plumb with the level and once it is ok, then place another nail near the floor. Do not drive nails completely in as you may have to remove them for final adjustments. Once that side is stabilized and plumb, go to the other side and take that assembly and carefully insert it into the one you have partially installed. Squeeze the two assemblies together so that they are as tight as can be and are snugged up against the sheetrock. Using the level again, be sure that the leg, which is not nailed, is also plumb. It should not have changed if you have not removed the shims or the plastic plug where the door now fits. It is now that you place more nails to stabilize the door on both sides. Once you have placed all nails (having not driven them all the way in), you may remove the plastic plug. If, for some reason, the door will not open when the plug is removed, there may be a nail driven into the face of the door from the backside. If this is the case, the side with the door will have to be removed and the nail removed, too. Simply replace everything, putting the door back in exactly the same place. You may need to mark the walls with pencil for re-location. Once you have the door in place and operable, the nails may be finally driven in completely. Use a nail set to sink the nails below the surface so that you can fill the holes with nail putty. Be sure to seal the cracks with latex caulk before painting.
|